- Details
Well, that (w/e 16/05) was a defining week!
Having placed a couple of bait hives, I had decided I might post a picture or two to explain a bit about this, and to mark the start of my quest for bees to populate the Warré.
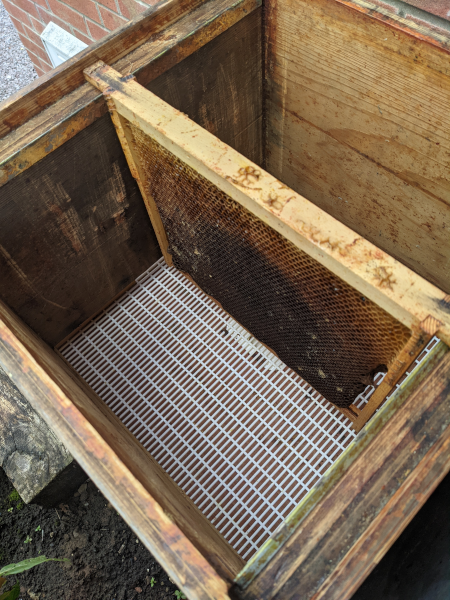
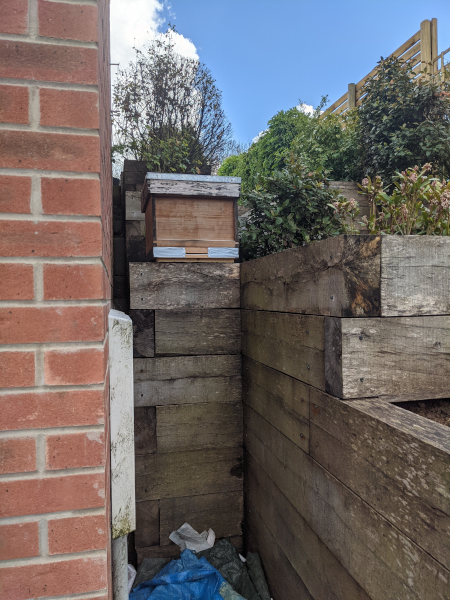
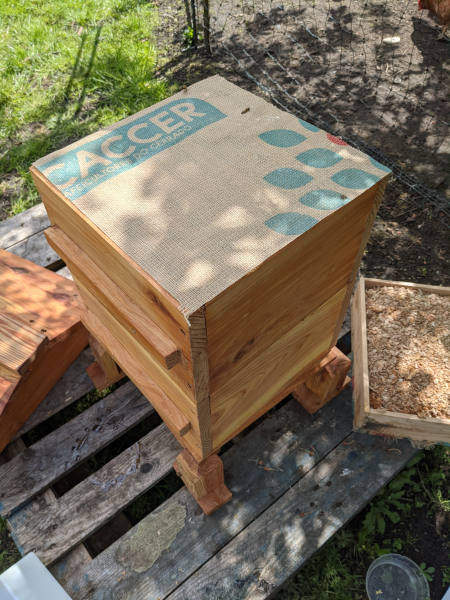
So, what you see below is exactly that. Only as I didn’t have any spare floors (and if I had, they’d ideally need to be solid floors anyway; swarms are renowned for their distaste for bait hives with open mesh floors), I screened off the bottom of a Bailey board to fashion a “floor” of sorts. The small entrance on these is theoretically ideal, at least.
To this setup, I added the obligatory frame of smelly old brood comb, a dribble of lemongrass oil, plonked the whole thing in a spot at home, close to where we’ve had swarms land in the last couple of years (the other went into a location close to the main apiary), and crossed my fingers.
 |
 |
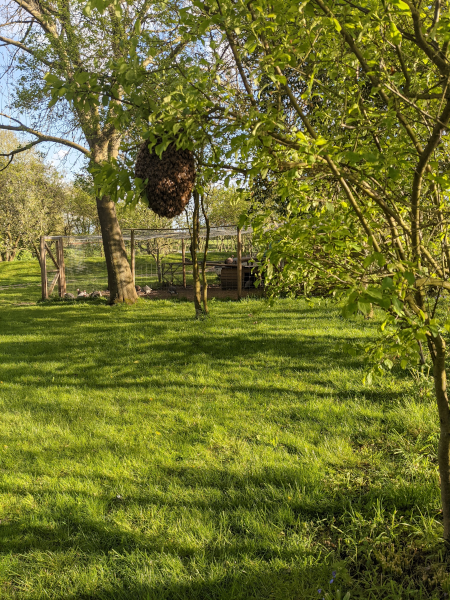
And, it worked!!! ... the finger crossing, that is - not the bait hives, which are still unoccupied - as, not 20 minutes after taking the above photos, I took a phone call from the guys at the fabulous Devol Kitchens, to tell me they had a honeybee swarm in their grounds. Serendipity indeed.
I therefore hurriedly grabbed some kit, chucked it into the car and drove down to take a look… and, well, as you’ll see below, it was a beauty; almost certainly a prime swarm, and at a height of about 6ft, on some small branches. The bees were docile to the point of being lethargic, and I got the impression this swarm had been caught out in-transit by the heavy showers which had occurred during the afternoon, and was not going anywhere in a hurry.
 |
 |
| “If Carlsberg made swarm captures …” | |
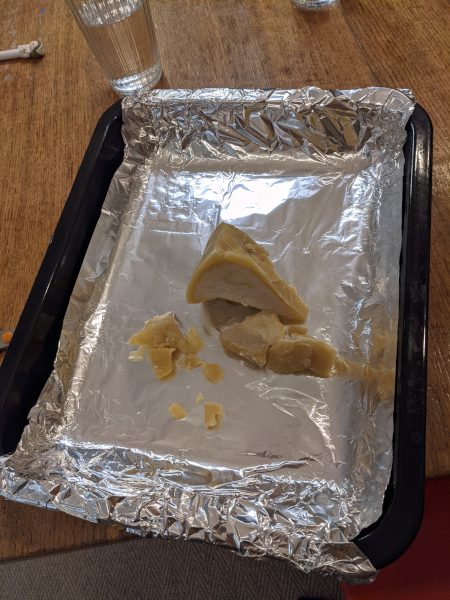
Having returned at dusk to collect the box, my thoughts then turned to getting the bees into the Warré the next morning. The first thing was to ensure I had primed the top bars with some fresh beeswax before turning in for the night, so (in the absence of a more elegant plan) I broke all the safety rules, banged the oven up to 75° (beeswax melts at about 64°), melted some of my cappings wax from last year in a roasting tray, and quickly dipped the top bars - à la...
 |
 |
The following morning brought the main event.
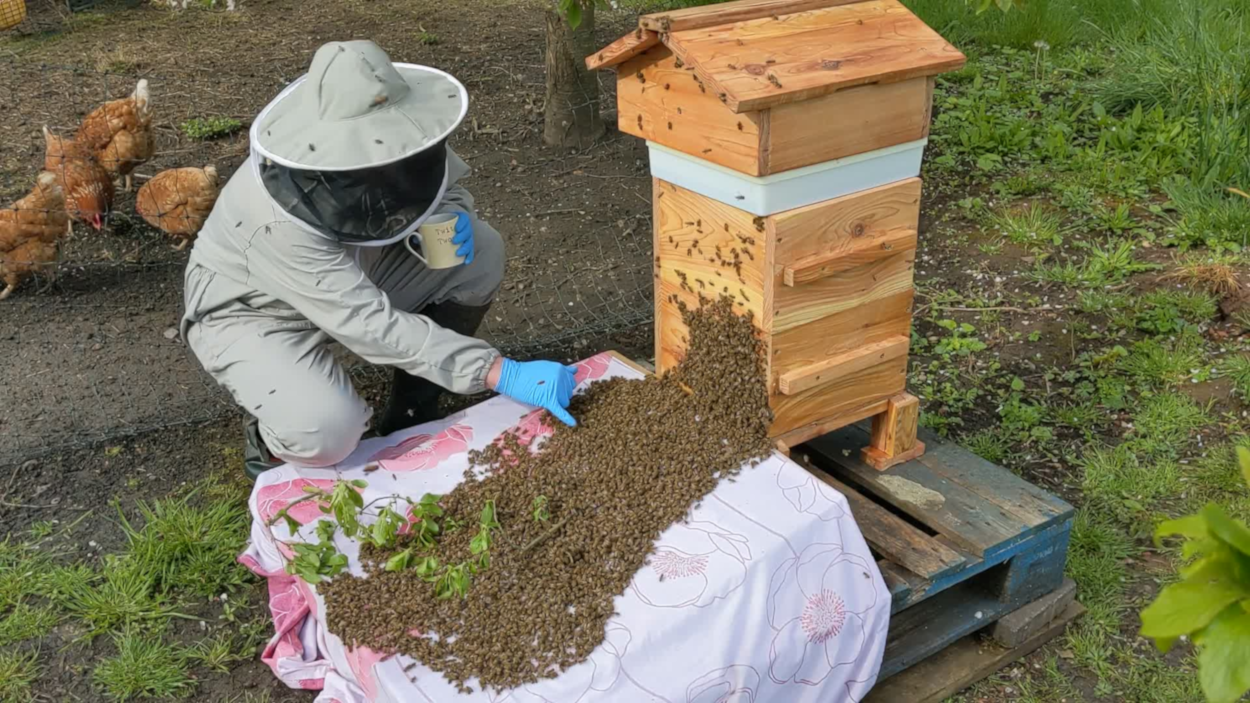
Now, I have hived a good few swarms over recent years, and my ‘tekkers’, such as it is, is to simply dump the bees into their new home. Although this is somewhat crude, it has never failed me. However, in the spirit of the Warré being an adventure into uncharted waters, and into a gentler approach to beekeeping, I decided instead to try and “walk them in.” There are videos of this all over the internet, and it is quite a spectacle.
The premise is that, having been shaken out onto a sheet, sloping up to the entrance of the hive, the bees - who naturally walk upwards - will march-on up to the entrance, and into the inviting dark space with which they are greeted. Simples.
 |
| walking in the swarm |
In for a penny, in for a pound, and the picture above shows me gleefully watching Her Majesty striding through the throng, and ultimately into the hive entrance. RESULT!!! She, incidentally, is a black stunner - and I shall hopefully be able to share a picture or two of her at a later point. With any luck, she’s AMM to the core.
At that point, and with much fanning in evidence at the entrance, I left them alone for a while, to finish their migration into the hive - not least as it’s a tad tricky to drink a mug of coffee with a veil on 
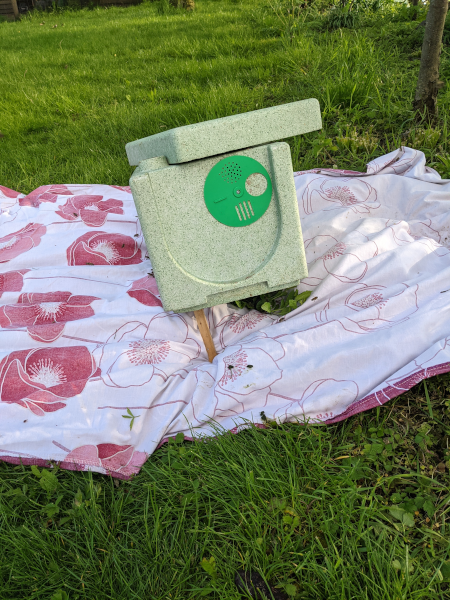
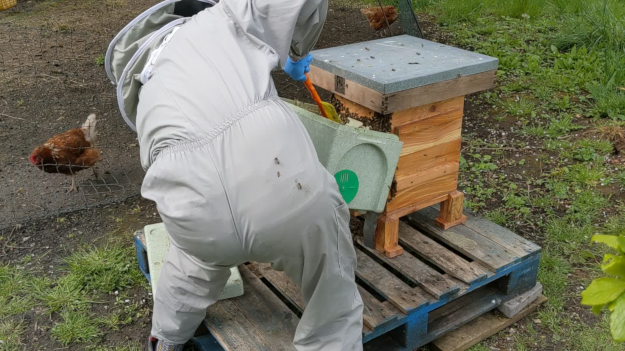
Caffeine cravings satisfied, I returned after 15 minutes to check on progress, only to find …. Aaaargh!!!!!!! - see below … Well, we all know that bees don’t read the books.
I suspect that, had the hive contained drawn comb, they would have decided to stay put, but, in the absence of this, it seems like the Queen had decided to leave the box, and all the bees were assembled high up on the outside of the hive. Hmmmm.
Suffice to say: 1) I’ll probably not be trying to walk bees into a hive again, and 2) I quickly resorted to the tried and tested technique of dumping them into the hive, having first swept them back into the nuc; though, had I thought laterally, I might equally have tried to open up a gap at the top of the hive, and they may have entered there of their own accord. In any event, a number of lessons were learned here, but at least that got the job done.
 |
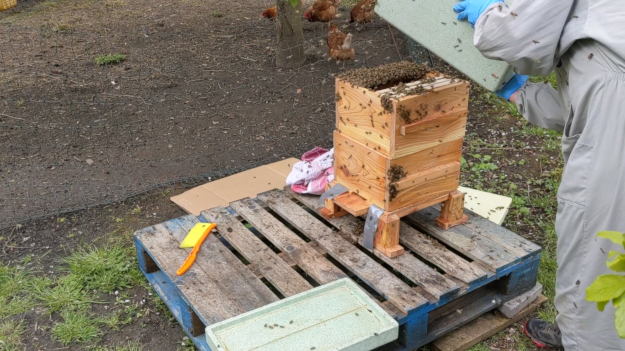 |
Incidentally, you’ll see, from the pictures above, that I started this setup with an English feeder sitting directly over the top bars. Eventually, I placed this atop a National crown board, enclosed in a super, with a National roof above … just as a temporary measure, and really to give the bees access to some food, for the first day or two - in order to both encourage them to stay, and, of course, draw fresh comb.
The rest - in the absence of any other barrier to exit - was then in the lap of the gods, and the waiting game began.
Roll forward 4 days …
 |
 |
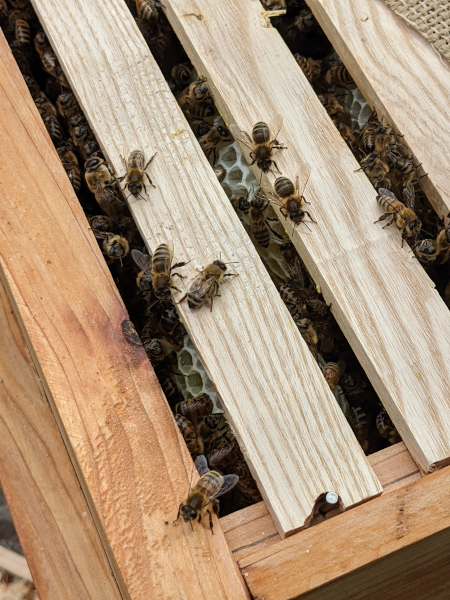
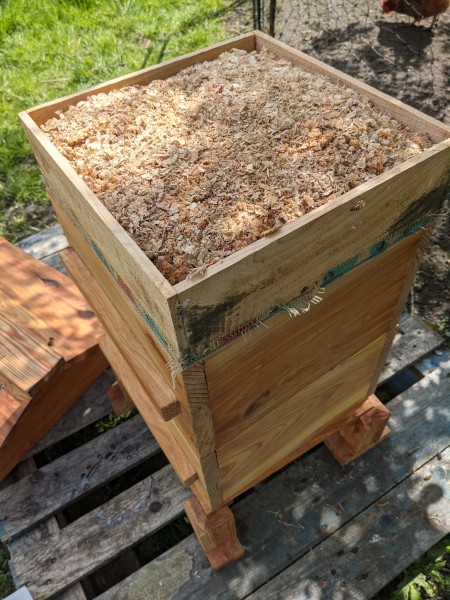
... and it looks like we have a confirmed success; the bees seem to have decided to call this ‘Home’:
The fresh comb, being fragile, could be compromised by trying to lift the frames at this point, so the plan for now is to leave the colony well alone, to establish. The feeder has come off, and we’ve installed the cover cloth and quilt, as below. The roof is now on … and the adventure really begins.
 |
 |
 |
| cover cloth on | quilt on | roof on |
Very soon, of course, we’ll be needing to keep an eye on the comb-drawing, in order to pre-empt the colony running out of space, and to “under-super” (a paradox, if ever there was one) in a timely fashion.
In the absence of observation windows, I have a cunning plan here, which should avoid me having to open the hive to do these checks. Better still, it’s going to involve some technology 
Curious ?! I hope so … in which case, please keep an eye out for the next installment.
- Details
So, the first thing to say is that I'm no woodworker; not by any stretch of the imagination. However, I do know one end of a hammer from another, and have a healthy enthusiasm for trying things out and screwing things up - so what could possibly go wrong?
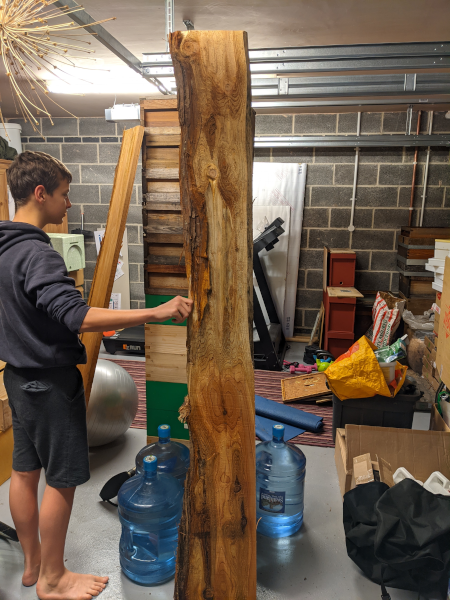
In this spirit, and with lockdown boredom setting in (this was "Lockdown #2 - Revenge of the tedium"), I took a trip to see the brilliant guys down at Belvoir Sawmill, and returned home with the following. I can't remember the exact timing / circumstances, incidentally, but please rest assured that - at the time I made the trip - it was fully compliant with the rules.

 |
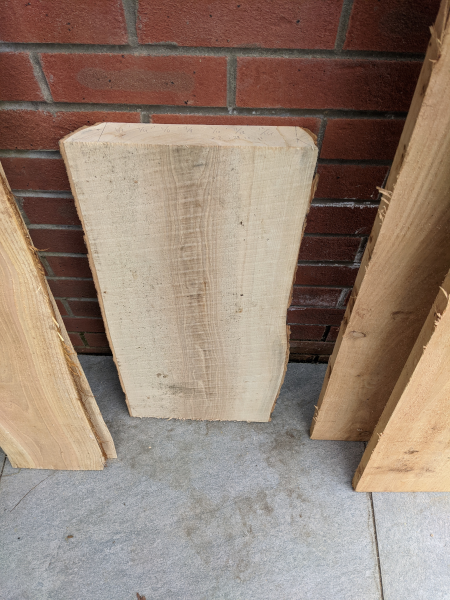 |
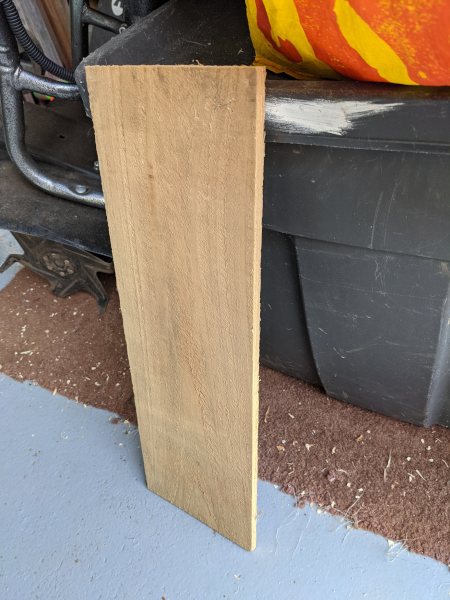 |
| ... Some offcut planks of rough sawn Western Red Cedar ... | ... a big hunk of Ash from the offcuts shed, and ... | ... some cedar shingles; excess from a customer order ... |
The timber was then stacked in the garage for a period (certainly over 6 weeks) to allow it to season; though cedar dries quickly and is relatively dimensionally stable anyway (the ash was already pretty dry), and then, it was GAME ON!!!
Sadly (or not, depending on your point of view), I didn't maintain much of a record of the machining and build, but, as you can well imagine, it ensued over the course of a number of weeks (at points when the instinct to 'potter' kicked in) and involved a good amount of electric-planing, table-sawing and routing (a wholly new skill for me), and glueing and screwing. All the consumables were things I had lying around in the garage.
The one thing I would say is that, before working the wood, I was dead-set on making boxes with observation windows, which would have been an ideal use for some perspex I have lying around. In the event, I came to the view that this was biting-off a bit more than I could chew. I did at this point chunter to myself about how I would then observe their comb-drawing (and hence decide when to add boxes underneath), but have decided to try a mini endoscope - attached to a mobile phone. If nothing else, that could give me some cool pics for this blog. Oh, and, whilst I have not yet purchased this, I have investigated what's out there, and have verified that there are ones which will fit into the small entrance which the Warrés possess. One step at a time, though.
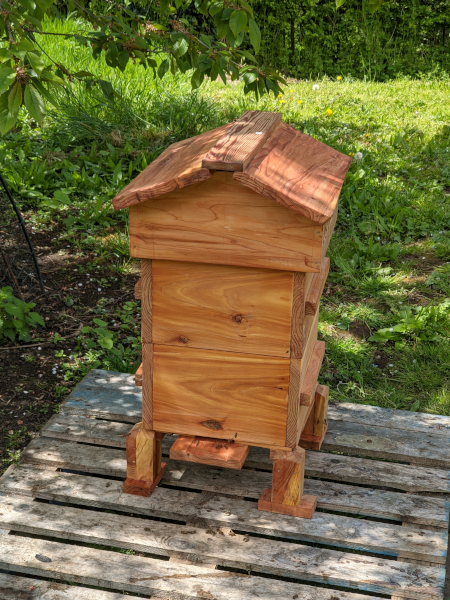
Anyhow, jumping forward a tad ... once assembled, the hive got a coat of Boiled Linseed Oil; mainly as I like the colouration it gives the wood. Indeed, I do the same with all my other WRC hives too - even though there's no need, from a rot/longevity perspective.
The results - of which I think I can be justifiably proud - are below... along with some pointers to specific "features" / mistakes:
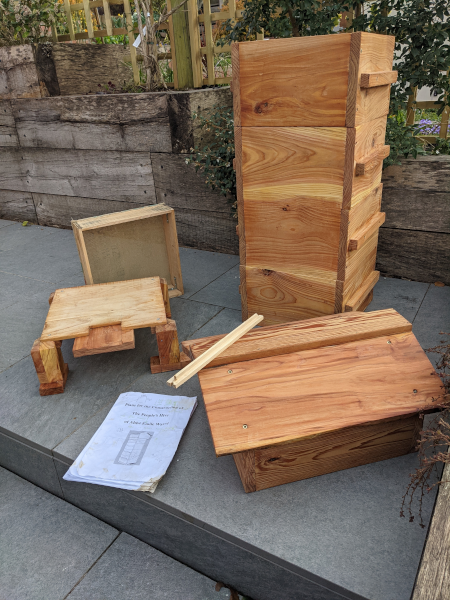 |
 |
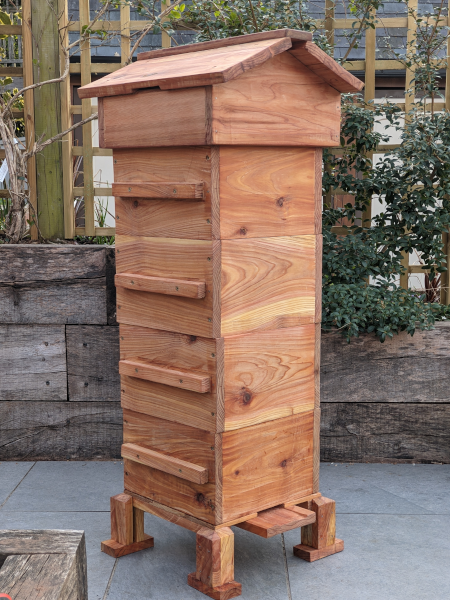 |
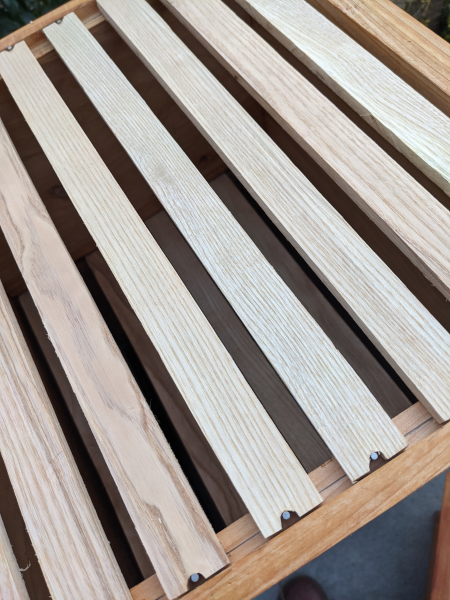
| 1) All the component parts | 2) The top bars in-situ | 3) The hive, fully assembled |
Beyond the warm glow, as I say, there are probably a few things which are worth pointing out, for the general record:
- The keener-eyed amongst you may notice that the ventilation traditionally at the top of the roof side-walls is broadly absent. There is ventilation, however; not least due to the channels I cut into the middle (underside) of the roof sections, but also as the gap between the ridge piece and the gable-end is exactly as per the 'proper' design. The reason ??? ... well, I could lie, but it's basically as I misread the measurements for the gable-ends. Ooops... So the choice was to either recut these from more timber (thereby generating some waste - even if some of the wood could be repurposed), or to make-do and mend. I chose the latter. I'll get through-draft, but just not as much. I like to think of it as a unique quirk. It is BESPOKE, don't you know. Who knows, it might better suit the vagaries of the UK weather!
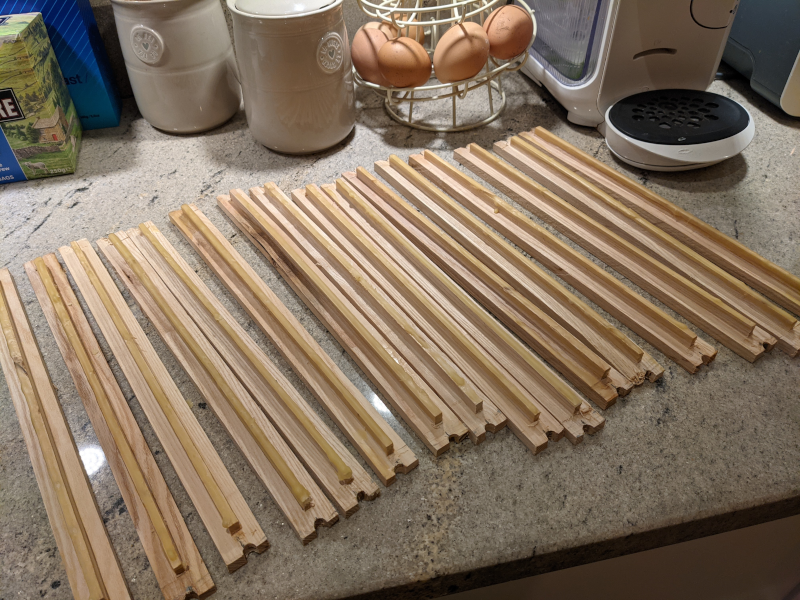
- The top bars are milled from the Ash. Ash is not supposed to be the most durable wood, but that doesn't entirely accord with my own experience. In any case, it's going to be inside the hive, and will be full of propolis in no time. The main thing that's noteworthy is probably that I milled these into a "T" profile - with the intention of dipping the spine into molten beeswax (cappings wax from my own hives) before giving them to the bees. I'm planning to do that as close to the time they go into the hive as possible, to offer-up wax with maximum aroma and plasticity, which should hopefully entice the girls to draw comb more readily.
- Also, the middle picture shows how I've decided to try and deal with regulating the spacing of the top bars. There are probably good, standard ways of doing this, but I couldn't find any mention of these during my cursory web searches. Necessity is the mother of invention, so I decided to butt-up two top bars at a time, and plunge a 7mm drill into the centre; thereby creating a c.a. 3.5mm 'U'-shaped notch at the end, which has then permitted me to fashion a kind of fixing with some stainless steel panel pins. The bars sit loosely between these pins, and can readily be lifted-out ... at the moment. Let's see!
- The quilt is of thinner (10mm) timber than the standard plans, though David Heaf tends to suggest this is acceptable. This allowed me to fully utilise the shingles - the remainder of which form the hive floor. The bottom of the quilt is cut from some coffee sack (as is the hive cover, not shown here) - donated willingly by the team at St Martins Coffee Roasters - purveyors of magnificent coffee from all over the world. If you're local to Leicester, give them a try. In fact, do so even if you're not local to Leicester..!
So that, as they say, is that.
We're now ready for some bees, and, with immaculate timing, it's about time for some bait hives to go out - so you might well guess what the next blog entry is going to cover. We're planning for two bait hives - one at home, in the vicinity of a spot where swarms have landed in consecutive years, and one at our main apiary. Of course the latter is to catch bees from outside the WH stocks, which will not be swarming this year ... no, Siree ... never.
On that rather optimistic note, hasta la proxima.
Craig.
- Details
Wymeswold Honey is having a crack at some (even more) sustainable beekeeping in 2021. Whilst I like to think our practices are already at the more sustainable end of the spectrum (we don’t endorse bee imports, don’t use miticides, don’t feed unless required and try and avoid unnecessary / aggressive interventions and inspections), I am being drawn to an ever-more bee-centric approach to apiculture.
To this end, I purchased the following volume, which I can wholeheartedly recommend. David has written a very accessible book; engaging, and written in plain english. Top man.
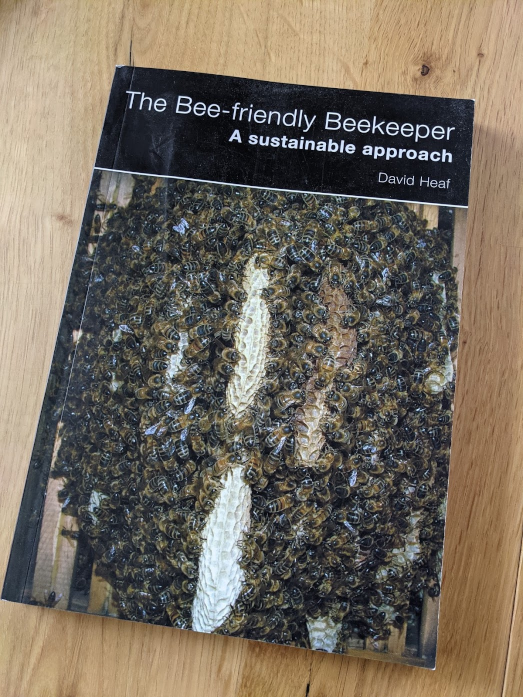
The Bee-friendly Beekeeper; A sustainable approach - David Heaf
If you choose to buy it, please consider getting it from Northern Bee Books, here - rather than lining the pockets of Jeff Bezos. Don’t get me going!
Anyhow, off the back of this, I’ve decided to try my hand at top-bar beekeeping this year, in a Warré Hive. You can, of course, buy these hives, but, in the true spirit of sustainability (and indeed, the Warré philosophy of the simple ‘people's hive’), I decided not only to build my own, but also to do so by machining some locally sourced UK timber - pretty much straight from the tree. For anyone wanting to try their hand, construction plans are in the above book, but can also be downloaded from here: https://warre.biobees.com/plans.htm
The promised land to which I am trying to migrate is a totally symbiotic relationship with my stock, involving the sole use of locally adapted bees, who are not constrained in their innate behaviours, and are naturally able to tolerate - and thrive in - their environs; including an ability to cope with the endemic varroa mite.
Given that I’m just putting the final flourishes on it, the next post is going to be about my hive construction, just so you can see what I’ve achieved … but from that point (given that it’s already April), the updates should then hopefully come thick and fast, as I populate and manage the hive through the season.
Hopefully, you’ll follow me on this journey, and we’ll all learn something.
Wish me luck!
Craig.
- You are here:
-
Home

- Our Warré Hive Adventure